Create your First App
Elements of the Design Tab
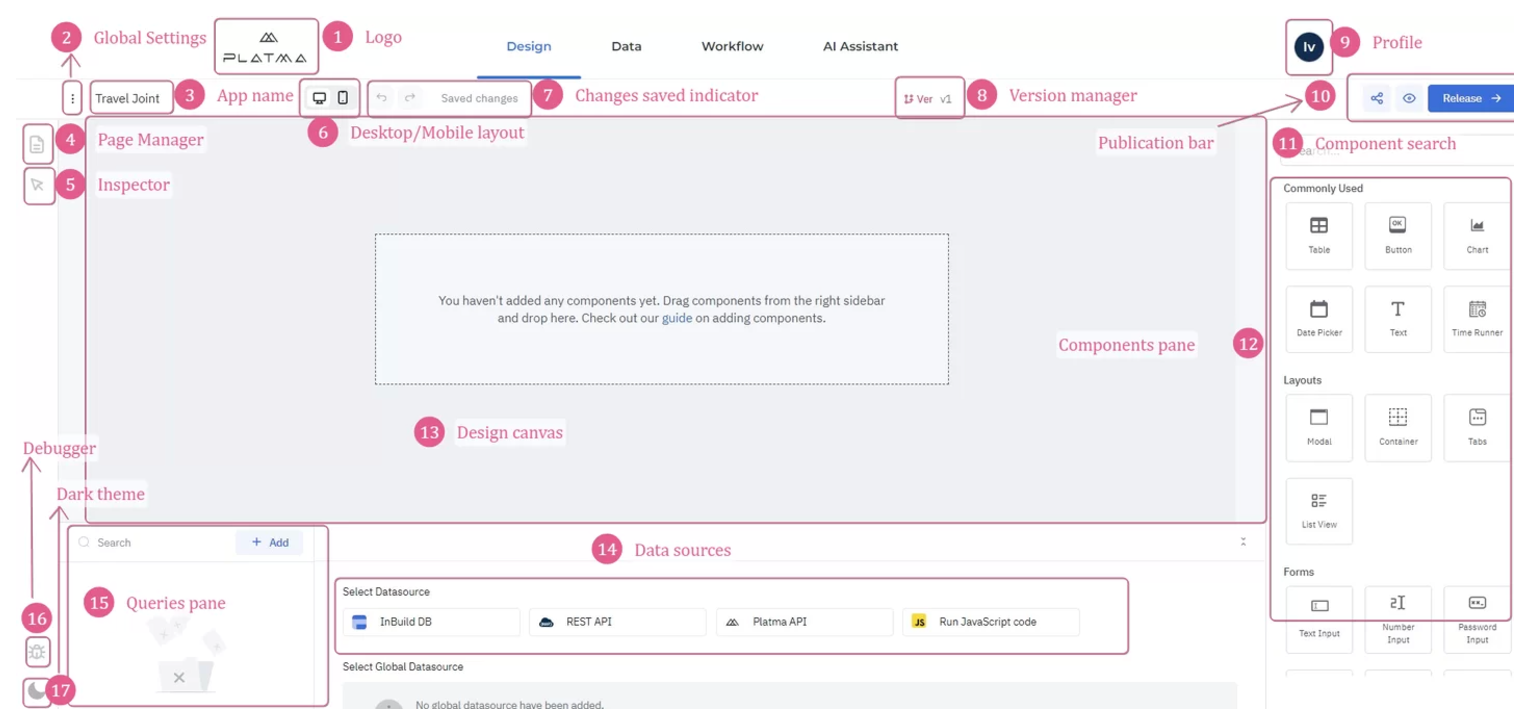
1. Design Canvas
-
 The central area where you arrange and configure components.
 -
Drag and drop elements from the Components Pane onto the canvas to start building.
-
Use the canvas to visualize your app for both desktop and mobile layouts.
2. Components Pane
-
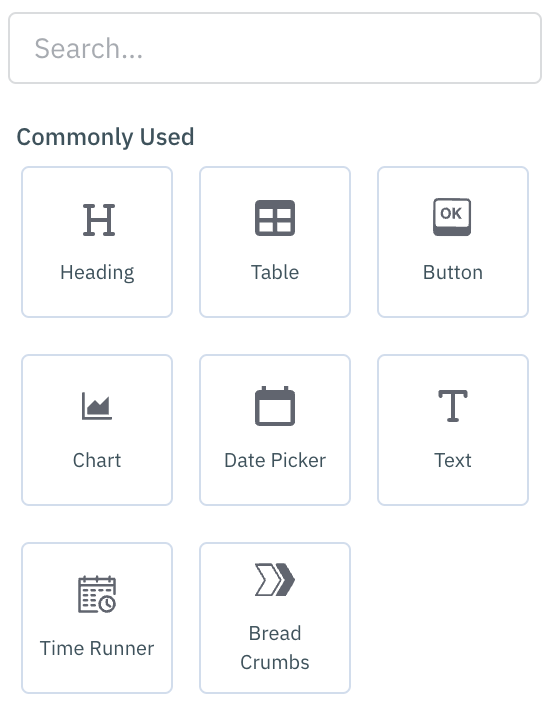 Located on the right side, it provides all the building blocks for your app.
 -
Scroll through or use the search bar to find specific components.
-
Drag components onto the canvas to add them to your app.
3. Pages Manager
-
Found on the left sidebar, it allows you to organize your app's structure.
-
Use it to:
-
 Add, rename, duplicate or delete pages.
 -
Mark as Home: Set a default landing page.
-
Reorder Pages: Drag and drop pages to rearrange their order for navigation.
-
Hide Pages: Hide pages from the navigation menu; hidden pages remain accessible via direct URL or page actions.
-
Page Handle: Adjust the URL handle of a page for custom navigation.
-
4. Inspector Panel
Located on the left sidebar, under Pages Manager. Here, you can view and analyze data for queries, variables, and global parameters directly from the panel.
1. Queries:
- Track
 details of running queries in real-time.
 - Preview query responses and validate their data.
2. Components:
 Inspect the properties and values of the components added to the canvas.
3. Globals:
The Globals section consists of the following sub-sections:
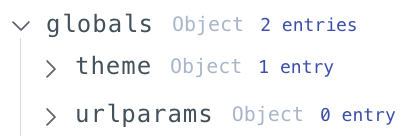
- theme: shows name of currently active theme.
- urlparams: contains information about the URL parameters of the application.
Additional Features:
-
 Pin: Use the Pin Button to keep the Inspector Panel opened while working.
 -
Copy Data: Hover over items in the panel
to reveal options for copying paths or values.
5. Global Settings
Accessed via the three-dot menu (kebab menu) near the app name.
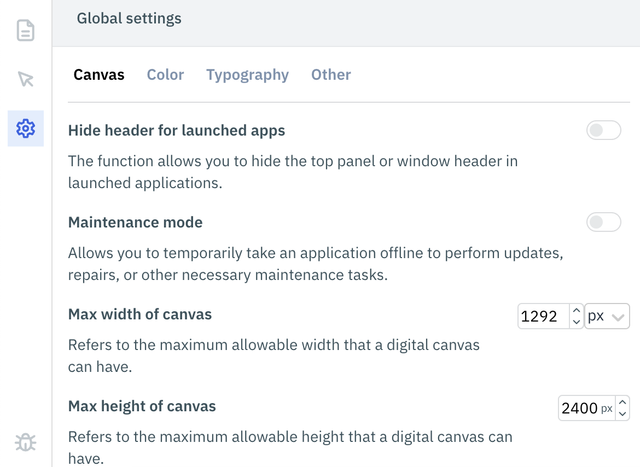 Use it to:
-
Enable/disable headers for launched apps.
-
Adjust canvas width, height, and background color.
-
Activate maintenance mode for your app.
6. Layout Toggle
-
 Quickly switch between Desktop and Mobile layouts to preview how your app will look and function on different devices.
 -
Adjust components independently for each layout to
optimize user experience.
7. Version Manager
-
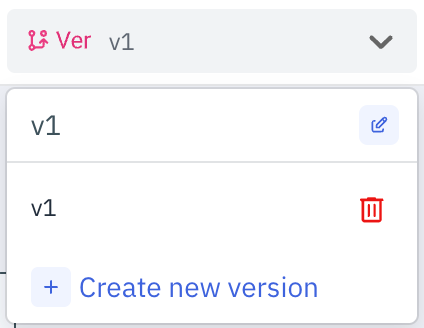 Located in the top bar, it tracks all saved versions of your app.
 -
Create, edit, or revert to previous versions without affecting live apps.
-
Useful for team collaborations and maintaining version history.
8. Publication Bar
-
Located at the top-right of the Design Tab.
-
Provides options to:
-
Preview your app in real-time.

-
Share it with others for feedback.
-
Publish it to make it live.
-
9. Dark Theme
- Click the dark theme button to active.
-
Key Benefits:
-
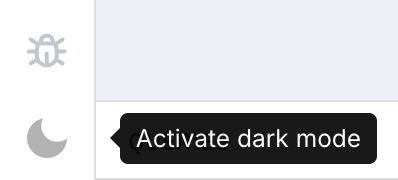 Reduces blue light intensity, offering better comfort for your eyes.
 -
Improves syntax highlighting for better code readability.
-
10. Data Sources
Select a Predefined Data Source:
-
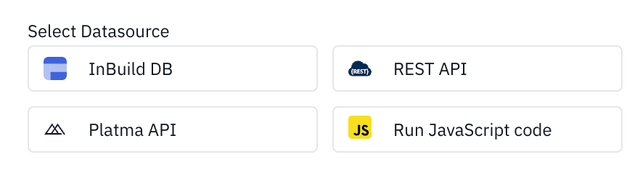 InBuild DB: Internal database for quick setup.
 -
PLATMA API: Native API for seamless integration within PLATMA.
-
REST API: Flexible integration with external web services.
-
Run JavaScript Code: Add custom logic using JavaScript.
11. Debugger
Accessing the Debugger:
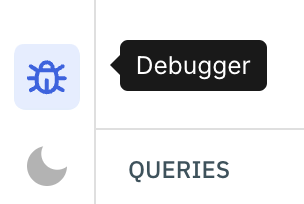 Click the Debugger Icon in the bottom-left corner to open the Debugger.
- A pop-up appears displaying logs and errors.
Monitoring Errors:
 View a list of errors and their details in real-time.
- Click the Pin Icon to keep the Debugger pop-up fixed on the screen while you work. To unpin, click the Pin Icon again.
Clearing Logs:
- Use the Clear button to reset the log history.
- Note: Clearing logs does not resolve errors; fix them manually.
12. Queries Pane
First, you should select a Data source to enter the settings and proceed to query.
1. InBuild DB
 The InBuild DB is PLATMA’s internal database for quick and easy setup. It allows you to perform common database operations without external dependencies.
Steps:
- Select InBuild DB as the data source.
-
Choose a Table Name from the dropdown menu.
-
Select the type of operation:
 List Rows: Retrieve multiple rows with optional filters and sorting.
-
Create Row: Add a new record by specifying column values.
-
Update Rows: Modify existing rows using filters and updated values.
-
Delete Rows: Remove rows based on defined filters.
-
Join Tables: Merge date from tables.
- Optionally enable Transformations to manipulate query results.

Use Preview to inspect data before running.
-
Click Run to execute the query.
2. PLATMA API
 The PLATMA API allows for seamless integration with PLATMA’s native services, enabling advanced app functionality.
Steps:
- Select PLATMA API as the data source.
-
Enter the Endpoint URL (relative to PLATMA’s API structure).
-
Configure query parameters in the following tabs:
-
 Headers: Add custom headers like authentication tokens.
 -
Params: Set query string parameters.
-
Body: Include payload data (if required).
-
- Optionally enable Transformations to manipulate query results.
-
Use Preview to validate the API response.
-
Save and Run the query.
3. REST API
 The REST API supports integration with external web services, making it highly flexible for third-party integrations.
Steps:
- Select REST API as the data source.
-
Enter the full Endpoint URL (e.g., https://api.example.com/data).
-
Configure request settings:
-
 Request Type: Choose GET, POST, PUT, PATCH, or DELETE.
 -
Headers: Add key-value pairs to include headers.
-
Params: Add query string parameters by specifying keys and values.
-
Body: Add data in a structured format by specifying key-value pairs.
-
- Optionally enable Transformations to manipulate query results.
-
Use Preview to test the API response and adjust configurations.
-
Click Run to execute the query.
4. Run JavaScript Code
This option enables you to write and execute custom JavaScript code directly within PLATMA to handle specific functionality.
Steps:
 Select Run JavaScript Code as the data source.
- Write your JavaScript code in the provided text area.
- Use Preview to test your code execution.
- Click Run to execute the query.